Applying styling to SatVu imagery
This page will include the various style files you may need to use when trying to visualise HotSat data in line with SatVu’s style guidelines. This page contains the files necessary for having a local version of the standardised “New Citrus” colour ramp. Additionally, instructions are available on how to load these style files into the two most commonly used software suites (QGIS and ArcGIS Pro).
SatVu Colour Ramp
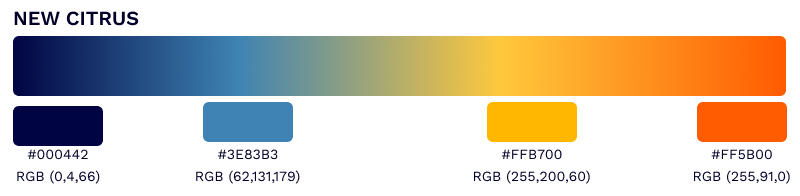
SatVu’s branded imagery utilises our “New Citrus” colour palette. The image below outlines the main four colour stops in the colour palette: #000442, #3E83B3, #FFC83C, and #FF5B00.
QGIS
Note for Linux Users
The New Citrus colour map may appear transparent in some areas when using QGIS on Linux. If you experience this issue, we recommend using QGIS on Windows or macOS, or manually creating the colour ramp using the hex codes and percentage stop locations provided in the image above.
Using a QML File
How to load:
- Download QML file by clicking this link. Preferably save it to a folder dedicated for style files and other branding files
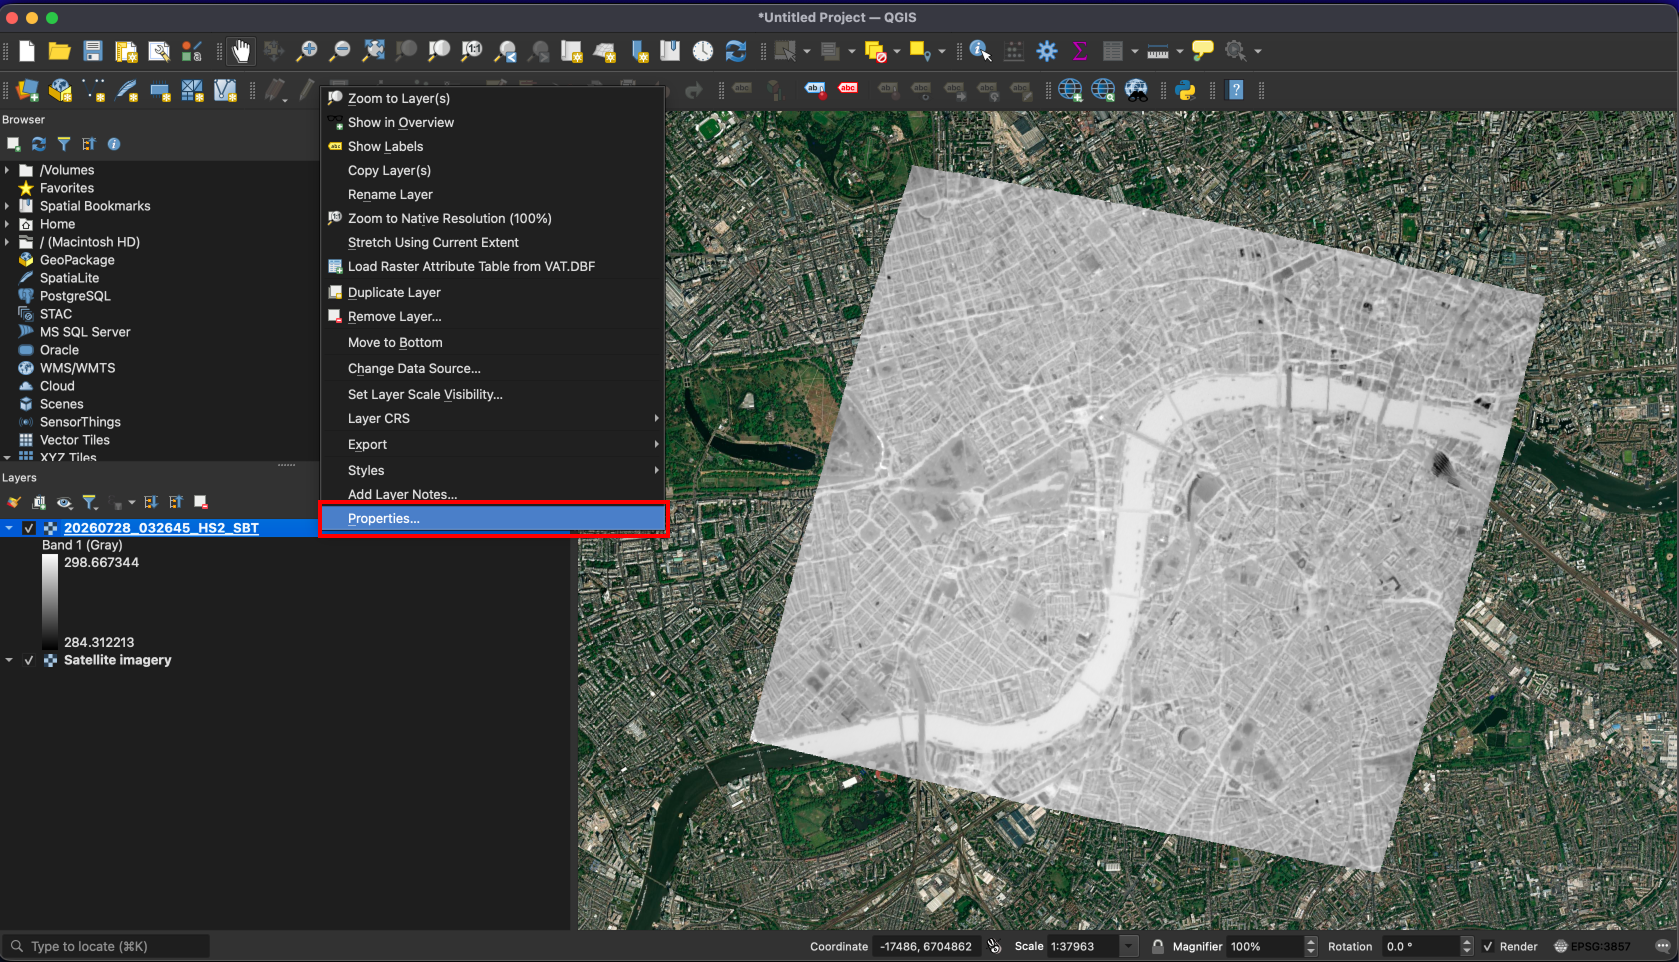
- With the desired raster (s) open in QGIS, right click on a layer and open Properties.
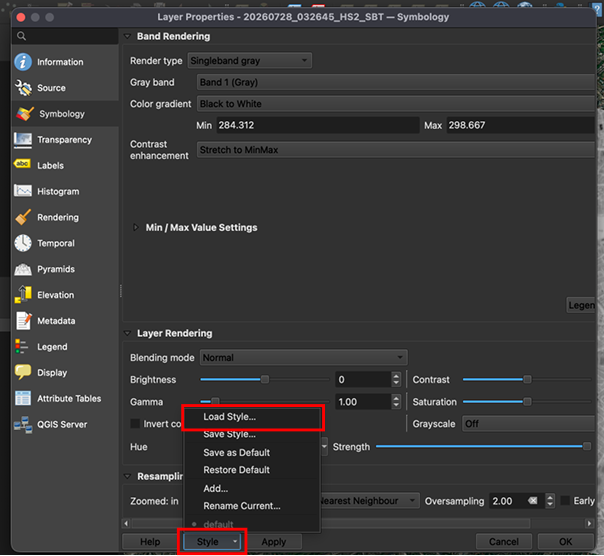
- Go to the Symbology tab. At the bottom left click the Style button and select the “Load Style…” option
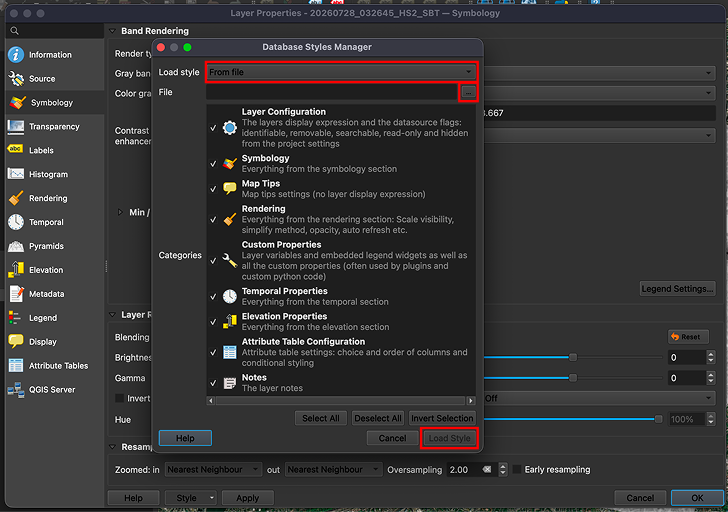
- Navigate to where you saved the QML file, select it, and click Open
- Now that the colour ramp has loaded, click the drop down arrow next to the ramp and select “Save Colour Ramp…”
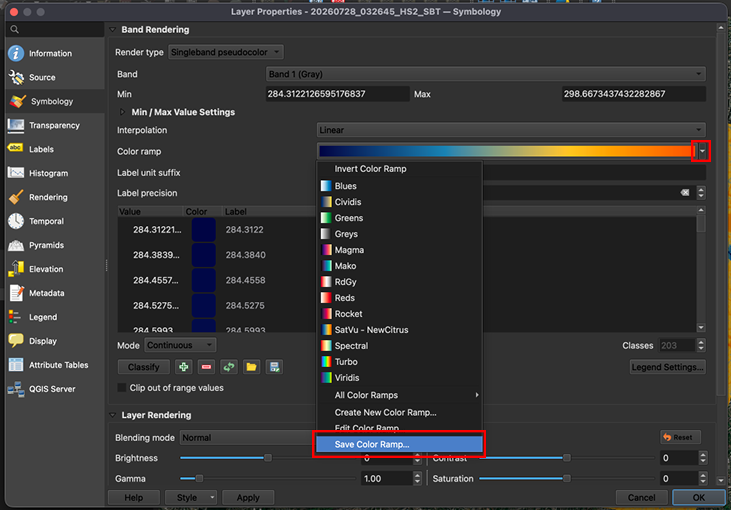
- In the new window, change Destination to “Default”, create a name for the colour ramp (e.g. New-Citrus_SatVu), add any additionally tags if you wish, check the “Add to favorites” box, and click Save
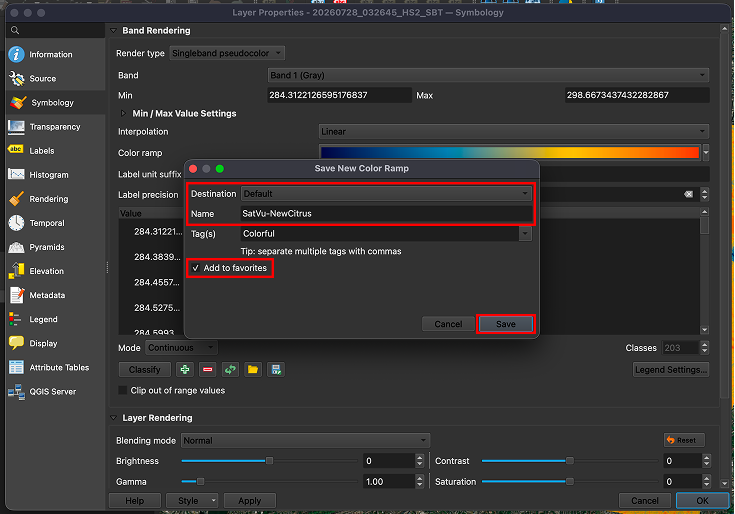
- Now, whenever you have a raster and would like it to be in New Citrus, navigate to the Symbology tab, ensure the “Render type” is set to “Singleband pseudocolor”, and the New Citrus colour ramp will be ready to use. You may be required to Classify and Apply for it to work.
ArcGIS Pro
Using a Style File
How to load:
- Download the STYL file by clicking this link, preferably to a folder dedicated for style files and other branding files
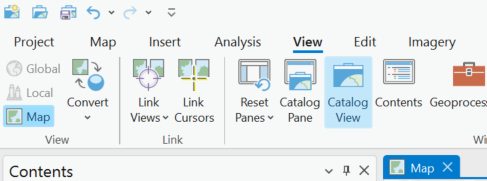
- In an ArcGIS project, go to the choose View tab and click “Catalog View”
- In the Catalog, right click on “Styles”, then navigate to “Add”, followed by “Add Style”.
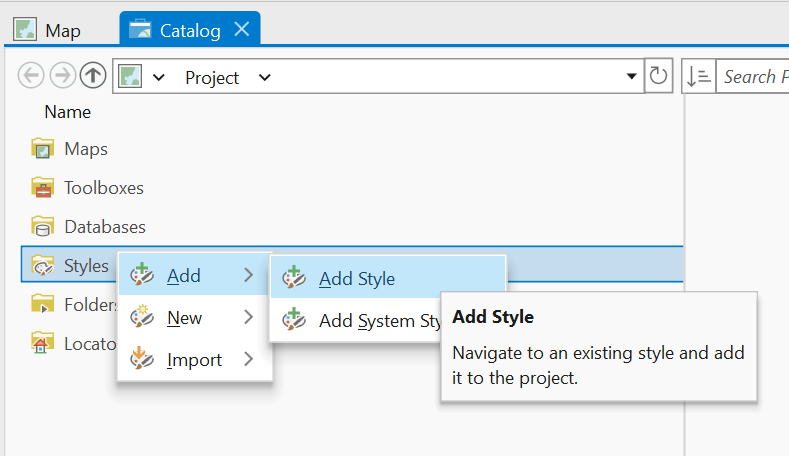
- Navigate to where you saved the STYL file, select it, and click OK
- In the Catalog, double click on “Styles” to see that the style file has been added to your project, the next steps will add the colour ramp as an option to all projects
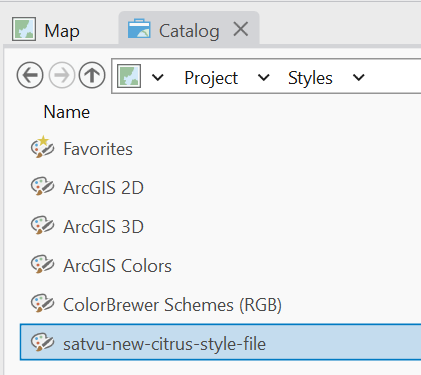
- Double click on the newly added style file, inside you will see the colour ramp; right click on it and select “Add to Favorites”
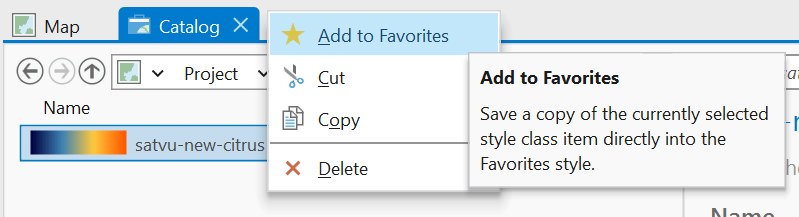
- Navigating back to “Styles”, and then into “Favorites”, you will see the colour ramp has been added, this will allow you to access it within Symbology like any other colour ramp option